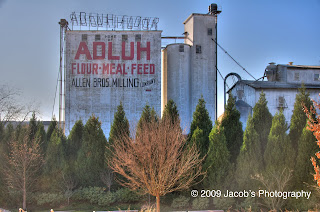
 So what is different about black & white photography nowadays as apposed to fifty years ago? Well, a good bit has changed. Most people now use a digital camera as apposed to a film camera, most people also edit their pictures on a computer instead of in a dark room (post-production), and most people shoot their pictures in color and then convert them to B&W. This post has to deal with the digital camera users since B&W film is still readily available.
So how do I shoot black & white photos with my digital camera? There are two different ways and the pros and cons of both will be discussed here.
You say your camera has B&W setting? Most DSLR’s and point and shoot cameras have a B&W option. This camera option can be useful if you do not plan on post production editing. To use this setting just go to your camera’s menu and select the Black & White or Monochrome setting and start shooting pictures. The big con is if you do decide to later edit the pictures you can but you will have much less flexibility with the editing options.
There is, however, another B&W option and in my opinion a better option. That option is to shoot your pictures in RAW format and convert them to B&W using Adobe® Photoshop, Apple’s Aperture, or your favorite photo editing software. I personally like, and use, the Aperture add-on Silver Efex Pro by NIK (the add-on is also available for Adobe® Photoshop Win & Mac). This software allows you to convert your color images to black & white with minimal effort. There are multiple choices for post-production image editing including: Neutral Exposure, Underexposure, Overexposure, High Structure, Pull Process N -1, Push Process N +1, Push Process N +2, Push Process N +3, High Contrast Red Filter, High Contrast Orange Filter, High Contrast Yellow Filter, High Contrast Green Filter, Full Spectrum, Full Spectrum Inverse, Dark Sepia, Soft Sepia, Ambrotype, Cyanotype, Tin Type, Infrared Film Normal, Infrared Film Soft, Soft Skin, Wet Rocks, Darken Contrast Vignette, Antique Plate I, Antique Plate II, Antique Solarization, Holga, and Pinhole. You can also simulate your favorite film type, and adjust brightness, contrast, and structure. There is also a ton of other options and settings within the Silver Efex Pro add-on. Apple’s Aperture, Adobe® Photoshop, and other photo editing software also have built in ways to convert your color images to black & white. If you would like to know more about Silver Efex Pro or any or any of the other fine software and add-ons NIK produces please check out NIK’s web site www.niksoftware.com.
On a quick side note, if you want to shoot infrared photography, there are companies that are now modifying DSLR cameras to be able to shoot infrared exclusively. If you are wondering why you cannot take infrared without a camera modification … it is because most camera manufacturers build their image sensors to block infrared light.
Well, I hope this has given you a jumping off point to go out and take your own B&W photos. Again remember that this is just my opinion and that there are many different ways to take or convert your own pictures to black and white.
