February 23, 2009

The Difference Between A Full Frame Sensor And An APS-C "Crop" Sensor DSLR Camera

What exactly is a crop sensor camera? Well, a full frame 35mm camera (film or digital) takes a picture that is around 36mm x 24mm in size. When digital sensors were first introduced it was not possible to make a digital sensor that large in any quantity. The ones that could be made were so expensive that no one would have been able to afford a camera that used one. Camera makers decided to make a smaller sensor that was around 15mm x 22.5mm which just happened to be close to the image size of the (short-lived) APS film format. The reason that we call them "crop" is because if you take a full frame image and crop the center 15mm x 22.5mm out of it you get an imager the size or the "crop" sensor.

So what does all of this technical mumbo-jumbo mean for the average photographer? Not a whole lot! For the average user a "crop" sensor camera will provide you with just as high quality pictures as a full format camera, just put your kit lens on it and enjoy shooting pictures. For people that want to learn more read on. Other than the obvious difference in image size the only other difference between the two sensors is the angle of view. Because the APS-C sensor is smaller is has a smaller angle of view than the full frame sensor has. This smaller angle of view creates a something called a "digital multiplier". The digital multiplier is 1.6x for Canon EOS DSLR cameras and 1.5x for Nikon, Pentax, and Sony DSLR cameras. This digital multiplier can work in you favor or it can work against you if you don't understand it. So all this to tell you that if you need a wide angle lens of around 16mm on a full frame camera you will need around a 10mm lens on an APS-C sensor camera to achieve that same wide angle. However, if you need a zoom of around 450mm you only need to buy a 300mm lens for the APS-C sensor camera. So to put it simply...

For Canon EOS cameras:
  • APS-C sensor focal length to equal field of view of full frame focal length you multiply by 1.6
  • Full frame focal length to equal field of view for APS-C sensor you divide by 1.6
For Nikon, Pentax, and Sony cameras:
  • APS-C sensor focal length to equal field of view of full frame focal length you multiply by 1.5
  • Full frame focal length to equal field of view for APS-C sensor you divide by 1.5
Also note that the aperture stays constant because there is no digital multiplier for lens speed. To find out more information on this topic including more technical data than you can throw a stick at please visit www.bobatkins.com.

February 20, 2009

Your Most Important Piece Of Equipment... And It Isn't In Your Camera Bag!

Here is a short story to start off this post. This story is from Adorama.com


"One of the most successful photographers of the 20th century, Henri Cartier-Bresson, had a single camera--a Leica rangefinder--and a 50mm lens. He didn't even have a light meter. He shot black-and-white film, hand-holding for every frame. He stopped every 36 exposures to rewind and reload. He had to wait until that night or the next day, or perhaps longer, to process the negatives, make contact sheets and study them with a Magnifying loupe to see the results. And with that simple set-up, he built a body of work that would influence generations of photographers and help to define photojournalism."  ~ Mason Resnick


With that being said... Nowadays, cameras offer many, many sophisticated options. Artificial intelligence-based metering, auto exposure and autofocus, super long zoom lenses, and super fast burst rates just to name a few. But with all these technical innovations we still forget to use the most important piece of equipment, our brains. The camera companies have yet to create a camera that can compose a shot, or see how colors, light, and shape interact, but unfortunately we still seem to rely on the camera, itself, to create a great shot. Unfortunately, the camera is only capable of making a correct exposure. So it is still up to our brains to modify the exposure to fit the mood of the picture, or to find the proper placement of the camera to produce the proper shot, or to decide what to leave in or remove from the frame.


So as you can see, just like Henri Cartier-Bresson, we need to use our brains to create the next great shot. So it doesn't matter if you are using the latest top-of-the-line DSLR, a compact, or a film camera don't forget to use your most important piece of equipment ... your brain.

January 31, 2009

Why You Should Own A Prime Lens

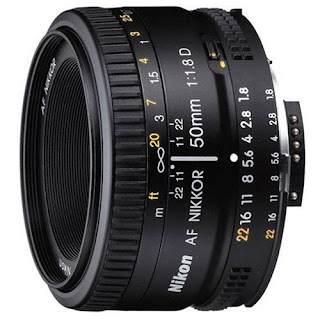
What is a prime lens?  A prime lens, according to Wikipedia, "is either a photographic lens whose focal length is fixed, as opposed to a zoom lens, or it is the primary lens in combination lens system".  In essence, a prime lens has no zooming capabilities it is only able to be focused.  Prime lenses are great for many different applications.  They can be used for portraiture, macro photography, sporting events, etc.  Prime lenses range from around the 10 mm area to well above 200 mm.  So you will be able to find a prime lens to suit your needs.

So now you are asking "Why should I own one?".  Well if you are really into photography there are many reasons to own a prime lens but here are five reasons to get you started.  1. They are fun.  2. They are nostalgic,  all of the original cameras came with nothing but prime lenses.  3. They have razor sharp focus.  4. They usually have large apertures somewhere around ƒ/1.4 or larger.  So now you can take great pictures in low light without using a flash.  5. They are relatively inexpensive starting at around $150.00.  So go out and get one of these great prime lenses and get to shooting.

January 27, 2009

How To Help Keep Your DSLR's Sensor Free From Dust

  1. When changing your lens try to do so with the camera pointed down or away from the wind.
  2. When using a zoom lens try to zoom in and out slowly to help reduce the risk of the lens causing suction and pulling dust into the camera body through the lens.
  3. When shooting in dusty or windy conditions, such as the beach, try wrapping the camera body in a plastic bag to help keep out dust and sand.
  4. If you must change a lens out in the field, while shooting outdoor photography, try to do so in a somewhat sheltered place such as a bus stop, a building, or in your car.
  5. Be sure to turn your camera off before changing lenses, this helps reduce the risk of dust particles being electrically attracted and sticking to the sensor.
  6. Try to be prepared, when changing your lens try to have your lens "ready to go" to avoid extended periods of time with nothing protecting the camera body.
  7. The best way to keep your sensor clean is to just pick a lens and stick with it but if you can't these tips will help you keep your sensor clean.

January 22, 2009

HDR Photography

High Dynamic Range photography, herein referred to as HDR, is a set of techniques that allows a greater dynamic range of luminances between light and dark areas of a scene than normal digital imaging techniques. The intention of HDR is to accurately represent the wide range of intensity levels found in real scenes ranging from direct sunlight to shadows.  Basically, HDR photography is a set of multiple images "layered" together using a computer program to show the full range of light and dark areas in the photo.

What you need to produce an HDRI or High Dynamic Range Image is a  digital camera with AEB aka Auto Exposure Bracketing (on a Nikon it is referred to as just "Bracketing") or the ability to shoot RAW format and a RAW editor such as Aperture, Adobe® Photoshop, or RAWShooter.  Also needed is an HDR Program such as Photomatix or Adobe® Bridge.  The difference between the these two programs is the fact that Photomatix is a "stand alone" program specifically created for the purpose of creating HDR photographs.  Adobe® Bridge, on the other hand, has many options.  One of those options includes merging multiple images to create an HDR photograph in Adobe® Photoshop the image must then be shrunk from 32 bit to 8 bit for editing.  None of the programs I have found have been exceptionally easy to use or very straight forward. However, if you are computer savvy or if you do not mind reading the "how to" that comes with the different programs it is not too awfully hard to figure out how to create beautiful HDR photographs. 

Okay, here is the simplest explanation of how to create a HDRI.  First, take one RAW picture or take, at least, three "bracketed" pictures (bracketing should be set up to be separated by at least one full stop).  If you choose the one RAW image you will need to create two more versions of the picture using Aperture or Photoshop.  One of the versions needs to be underexposed and one needs to be overexposed.  If you choose to go the way of bracketing you will also need and overexposed, an underexposed, and a properly exposed photo.  What is great about using the bracketed photos is the ability to load the bracketed images straight into the HDR creation software.  Once the pictures have been loaded into the creation software, let the software render the image and you now have a beautiful HDR photograph.

For more information there are many websites that come up doing a Google search for HDR photography, but here is a link to a page with tons of great information and samples of beautiful HDR photographs www.vanilladays.com.